Friday, 14 August 2020

Advanced Soap Ball Designs

 Ringed and Concentric Circle Ball Embeds


We covered the basics in the post 'Three Ways to Make Soap Ball Embeds from Scrap Soap'. I ended the post with a bit of a tutorial on making soap balls with previously made soap, using the Warm Grated Method using a microwave oven. In this post, we're talking about using fresh soap.

So in this post, I want to share with you the Ringed and Concentic Circle soap balls technique I created and have been using since Autumn 2012. These two techniques are not fast, or as easy as the previous techniques written about, but they do create a stunning soaps.

Ringed Balls

'Icy Snowballs' was my first Ringed Ball soap, back in 2012. I think I may have come up with this technique for embeds, as I saw nobody out there online doing this at that time. I knew a couple of other soapers had made concentric circle embeds using canes, but I saw nobody using this technique. This is something I figured out myself, but I suppose there's always a chance someone else out there had thought of doing the same thing.

''Icy Snowballs' cold process soap (2012)*

I learned a lot making this soap. There were lessons about Glycerine Rivers, (which I happen to like in this soap), the pitfalls of using oatmeal in bright white soap and sadly, I experienced my first downright bleeding obvious attempt at wholesale design imitation theft.

Imitation is the sincerest form of flattery? My arse! (ahem). I was really peeved. I mean, I knew who had done it, (they had recently sent me a friend request on Facebook, via a soapmakers Facebook group) and had commented and liked my picture of this this soap in that group. Not only was the colourway exactly the same, but the concentric balls too. This is such a unique design, there was no way it was a flook. I felt really hurt actually and there was no crediting me either. Aaaanyway, it's inevitable really, you put a good design out there are people are going to be 'inspired' (again, ahem). It really did make me stop and think wow, some people are just so brazen! On a plus, hers wasn't that great to be frank, so ha! (Bitter? Moi? Yeah, just a bit). Enough said. I wont go into it here, but there's a history with 'Icy Snowballs designs being copied, it happened again in 2016 by a soaper of high regard no less! But we will bank that for another day and another post!


So, where was I? (Sighs and takes a big glug of tea to calm down), oh yes. Ringed Balls.
 

When I first started soapmaking, I didn't use micas, I rarely use them today, mostly just the metallics. I favour mixing my own colours from oxides, clays, botanicals and some lab colours. I'd used cocoa to create pencil lines in a couple of soaps and had wondered if that could be replicated with colour in some way. Great minds think alike and after a search online, I saw a couple of soapers doing just that, but using micas, not only for pencil lines, but coating embeds too. I felt the mica effect was so slight as to be almost unnoticeable sometimes, so I decided to try to approach this ringed effect using coloured soap instead, with a view to creating thicker more pronounced lines.

The Design One aspect of soapmaking I really enjoy, is having an idea for a design and fragrance blend completely from the ether and designing/creating them from scratch. I'd planned to use a ringed ball effect for a while, but didn't want to simply use the effect without making it work along with the overall design, fragrance AND name. It was coming up to Christmas and as I was making balls for my Oh Christmas Tree soap, white snowballs made sense. To reference coldness, the only hues which make sense are on the cool side of the spectrum, so I went with a teal blue coloured ring and some craggy marbled white/teal ones too. (I also coated them in silver mica, just to see if it would add anything, but it was pretty much lost in the design). I wanted them to be floating in a swirling pastel coloured base, so went for a four colour in the pot swirl, which sort of looks like snow thawing on a landscape...

'Icy Snowballs' cold process soap (2013)*
The Name It was the design which prompted the name 'Icy Snowballs'. Remember those rock hard snowballs that naughty kids used to make and throw? With chunks of hard icy snow inside? Yeah, those. The craggy marbled balls referenced those and the rings simply referred to the cold.

The Fragrance I knew I wanted peppermint essential oil, evoking the chill of winter, but I also wanted something to reference the cosiness of being wrapped up warm and an earthy herbal note, referencing the outdoors. I came up with a very pleasing combination of soft notes of amber, vanilla, and powdery earthy oakmoss, green herbal notes, a bit of citrus with a menthol peppermint zing.

The Process After I'd come up with my overall design, formulated my fragrance / essential oil blend and name for this soap, I began to plan. Obviously, with any soap containing embeds, you're going to be making two (or more) separate batches of soap. Rolling soap balls takes a lot of time, especially in larger batches. These ones, take a lot more time.

Firstly, you need to make the soap to be used for the balls. For Ringed or Concentric Circle balls, ideally, you need to use fresh soft soap. I made two batches, one white, one teal. Two days later, I started to make the balls. I wont go into the craggy marbled balls process here, (another time).

The first element (the inside) is self evident. Simply pinch pieces off your soap and roll into balls. The tricksy part is coating the balls. You want to tear pieces off the other soap you made, roll it out and wrap each ball with it, like a little coat, then roll theball in your hands to make it fuse together. It's tricky, as the soap balls are quite soft and easy to dent and sometimes the 'coats' dont want to stick to the inner soap balls. It does take a while to perfect, but the effect is well worth it.

Concentric Circles

Did you ever eat Gobstoppers as a child? Aah those hard boiled sweet spheres that stopped yer blethering. Do you remember the huge hot cinnamon flavoured ones which had mullticoloured layers throughout? You couldn't help but take it out of your mouth from time to time and stare at the patterns created as you wore it down. No? Well I must be showing my age then! I loved those things! Sometimes I'd smash them to see the concentric rings inside. Ah, thems were the days...

'Icy Snowballs' cold process soap (2015)
Tree rings, droplet ripples in water, bracket fungi, geological formations and even inside a certain beetroot, (Beta vulgaris 'Chioggia'), concentric circles are all over the natural world. They're an incredibly pleasing pattern and one which I really enjoy using in my soap designs.

The Process It's exactly the same as with Ringed balls, but with more layers. With my third version of 'Icy Snowballs', (above), I did away with the In the Pot Swirled base and focused my time on the embeds. These were made with three separate batches of soap; two shades of blue and a white, coloured with ultramarine oxide and titanium dioxide.

*apologies for the low photo quality and the humongous logo stamps. These were created some time ago..!

Monday, 23 September 2019

On the hunt for Blackberry Sage fragrance oil...

I really do like this soap. Not least because the fragrance oil was one of those unusual hard to pin down ones. It definitely has notes of blackberry and sage, obviously, but also undertones of wood smoke, well burned bramble smoke to be specific, which sounds unpleasant, but actually really works well with the softer hebaceous and fruity notes.

Sadly I haven't been able to find a UK stockist of this fragrance oil for months, so cant do a remake, (very frustrating). Here's a pic of the last soap I made using that fragrance oil. I used a four colour In the Pot swirl, mixing my own colours with lakes and oxides.

ps on some mobiles and monitors, these colours look ridiculously saturated and psychedelic. In real life, (and in my photo), they're much calmer!

'Blackbery Sage' cold process soap

Thursday, 8 August 2019

Remakes and brand new soaps imminent!

Apologies, it's been a while. Life is getting in the way somewhat... Busy researching and prepping for fighting my late fathers case in the Infected Blood Inquiry, here in the U.K, so please forgive me.


Autumnal soaps are in the planning stages, so I will be back with a new soap or two shortly. I've put alot of thought into their design, both visually and fragrance wise, so can't wait to get stuck in! I've got full essential oil and fragrance and essential oil soaps planned, so I hope I've covered most bases.

We've got fruity, earthy, spicy and florals covered, plus some old favourites to remake (a rejigged 'Earthly Delights' & 'Woodlander' are definitely on the cards), along with some brand new ones too, (ooh exciting!). So stay tuned on Facebook, Twitter, Insta or Pinterest for the nudge!


'Spiced Butternut' cold process soap with butternut squash puree


In the meantime, here's a pic of a previous soap from our autumnal line , 'Spiced Butternut' cold process soap with butternut squash puree. Scented with a fragrance and essential oil blend of nutmeg, cinnamon leaf, black pepper, a tiniest smidge of clove and all rounded off with a goodly amount of creamy vanilla. Yes, this soap too shall return...

Wednesday, 26 June 2019

Three Ways to Make Soap Ball Embeds from Scrap Soap


Here are three ways to reuse your soap and create something to use in a new batch. Technically there are two methods, one of which has two variations, with a further two methods still. For simplification, I've separated them into three. I want to say that I haven't touched on hot process rebatching, as this is a post specific to creating soap ball embeds, but that's a perfectly reasonable way to reuse soap prior to rolling soap balls too.

My preferred method for soap ball embeds is to make separate batches of coloured soap specifically for that use, (as below) and rolled within 3 days. Planning is important. If I want to make layered or marbled soap balls in a particular colourway, I need to plan ahead.


Three colour fresh soap, made for making marbled soap balls

Three colour marbled soap balls from fresh soap. Note the smoothness of the surface

However, sometimes, I do make soap balls out of unwanted batches of fresh soap or scraps. So without further ado, lets look at all of the methods, starting with moulding from fresh soap...


The Fresh Soap Method


If you have a batch you're not happy with and the soap is relatively fresh, (say 2 to 7 days, depending on your recipe), you should be able to use this method for moulding soap balls. If I have to re-use soap for embeds using this method, I tend to use soap which is as fresh as possible, say two days old, which I keep in airtight containers to prevent moisture loss.


Soap balls made from fresh soap using a three tone pink in the pot swirl

If your soap is older than this, or has passed it's full curing period, it will probably be dry and harder on the outside, which isn't ideal as it's unyielding in the hands. In this case, it will be necessary to plane or grate off the exterior to reach the softer more malleable soap below. If the soap is fully cured and mostly unworkable, this method wont be easy.  But don't worry, if it's too meddlesome you can still make soap balls with it, using one of the grated soap methods below.


Three tone pink soap balls in our 'Bananadrama' soap

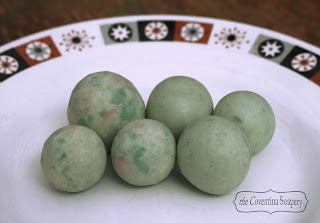
Once you have your soft fresh soap, I recommend working it in the hands a little to warm it up, making it easier to work. The advantage of using fresh soap as opposed to re-used grated soap, is the smooth consistency and flat surface you are able to achieve. The process is very straight forward, simply tear pieces off and roll into balls. It's that simple. Some people use a melon baller to get the precise amounts and to get a head start on the shaping, but I'm happy to just dig in without that.

There's also a bit of a misconception about needing to use a grater to make soap balls. In my experience, if the soap is fresh, there is no need to grate it, that's just adding an extra process and more washing up. If the soap is soft, you can roll balls with it. There's also no need for the balls to go through a curing period before using them in your soap, simply use them in your next batch. You can store them on your curing rack or in a clean airtight container, I find it makes no difference, provided they're used as soon as you can.

The Grated Method (cold)


This is a very forgiving and easy method. It's probably the one most commonly used I reckon. You can pretty much use any CP or HP soap, fresh or cured for this. Simply grate your soap on the finest setting and collect into a bowl. Then try to form the shreds into balls, by mixing and squishing the soap hard between your fingers and in your hands. You're aiming for a stiff dough like consistency, but not too dry, so that the shreds refuse to bond.


Soap balls made from cured soap, using the Cold Grated method

You can spray with a little water, but do so very sparingly, (we're talking in the region of  1-2g of water per 100g of soap max).You do not want to create a wet slimy mess, less is more in this case and a spray bottle is your friend. A little water combined with the warmth from your hands and the constant squashing and squishing, should help bring the soap to the right consistency, where it holds together and doesn't crack apart. Then you simply pinch chunks off and roll into balls.


Cold Grated method soap balls in our 'Oddball' soap

If you have stubborn dry shreds, simply spray with a little more water, mix well, cover and set aside for an hour. When you come back, keep on working that soap, squishing and mixing it. If this isn't working for you, then the warm method may be for you.


The Grated Method (warm)


Place your soap shreds or small chunks in an oven appropriate bowl and spray with a sparing spritz of water, squish and mix and cover well. You are aiming for just enough water to make the shreds slightly sticky, NOT wet or slimy.

Warning, be careful. Following these instructions should ensure your soap doesn't get too hot. we're aiming for warm, not hot rebatch! If the soap does get hot, leave it aside, covered, until cool enough to use. Stir with a spoon if unsure and only hand form once the soap is at a safe and manageable temperature

Top tips: Spritz as and when you feel the soap drying out and keep the soap covered in between forming the balls, to prevent it drying.
  
Traditional oven
Place in the oven on the lowest setting for half an hour. You are not aiming to cook the soap, but to simply warm it through. If your lowest setting is still 'hot', turn the oven off and then put the soap inside. The residual heat should be enough to 'relax' the shreds. Bring out, allow to cool, uncover and mix well. If you can work the soap, great! If not return to the oven and repeat.

Microwave oven
Place in the microwave and cook on a medium setting for 30 second bursts. Stirring between each burst to check for consistency and temperature.  When cool and workable, shape into balls. Microwaving will warm your soap up fast, so bare this in mind and check temperatures as you go.


45g cured soap (dry thin slivers approx 5mm thick)

Here is a test using 45g of cured soap, cut into small slivers and chunks. This soap is coarser than finely grated soap, so took a little longer to soften, but still only minutes. A larger amount of soap would require more water and a little more time to stir and soften. I recommend 500g max shreds at a time. It's a manageable amount which doesn't take up too much space.


Stages of soap softening using the microwave. Key below (click for larger image)

Image Key
1 ~ Spritzed with water and stirred
2 ~ After microwaving on 450 (900w capacity oven) for 30 seconds and stirred
3 ~ After spritzing & microwaving for a further 30 seconds and stirred (1 min total cooking time)
4 ~ After spritzing & microwaving for a further 30 seconds, stirred/crushed (1.30 min tot)
5 ~ After spritzing & microwaving for a further 30 seconds, stirred/crushed (2 mins tot)
6 ~  After spritzing & microwaving for a final 30 seconds, stirred/crushed (2.30 mins tot)

Do not be tempted to blat the soap on full power for 3 minutes, just to speed things up. This would be a BAD MOVE, unless you want to be clearing up a scalding volcano mess of hot soapy lava for the next couple of hours.


Finished soap balls made from fully cured soap using the Grated (warm) method in the microwave

By testing your softened soap after each stage, you will be able to determine whether you want a more chunky look or a softer, smoother more combined look. To illustrate this, here are the balls I made from the same soap. On the left are balls rolled after stage 4 and after stage 6. Both rolled easily and held together well. The soap on the right had a smoother softer consistency, more akin to fresh soap and I was able to roll creating a lovely smooth surface. Below are the same balls cut open to reveal the type of effects achievable and what you will see when you cut your final soap.


Differing effects from the same soap slivers

Interesting to note, directly after forming the balls, I weighed all of them and they weighed 45g! The same weight as the dry slivers I had started with, so any excess water had evaporated away during the making process.

Thanks for reading, come back soon bubble chums xx :)


Thursday, 20 June 2019

Re-using all that excess soap

It may not look pretty but at least I can still use it...


You've formulated, designed, mixed and poured your soap. All went well, no ricing, no acceleration, no mishaps. Great! The waiting begins... A few hours later and its time to unmould and cut, (yaay!). But, on no. The first slice is done and the heart sinks. Your expertly planned design is underwhelming, disappointing even, ok, really disappointing. Bummer.

Now I do have bars which don't quite make the grade, and I'm loathe to 'collect' any more bars of that ilke, (or share them here, heheh). So what to do with all that soap? Well, there are a few options. You could sell them at a discount of course, keep them for home use, or give them away to family and friends, (the soap still functions as soap right?). Or you could rebatch or reuse in some other way.


Why the .... do I have so much soap?!!


Soap scraps itching to be re-used

Now it has to be said that not all extra soap left will be down to unsuccessful design. You will probably have soap left over from bevelling or planing, maybe those mica swirled tops just didn't make the grade. Maybe they're so ashed up, so instead of steaming them, you've planed them off. Or perhaps you had a session of over zealous mica or cocoa sieving for a pencil line and your edges are all messy so needed tidying. Maybe that gorgeously bright mica morphed to a vapid shade of 'meh'. Whatever the reason, we soap makers often accumulate excess soap, there's no getting around it. "Got soap?" er, yeah and then some...


Transformation: rebatch or reconstruction*?


Right, you've decided that you'll be transforming your unwanted batch into something new. So what are you going to do? There are two options. Rebatch or reconstruction.

Rebatching
Rebatching is quite the faff, although it has to be said it's a very useful fallback. It can take an age to grate a whole batch of soap, (not to mention the crampy fingers and wrists, unless you have an electric salad shredder), as well as alot of time for mixing, cooking and remixing to break down the pieces of soap. I wont go into it this post, but there are different kinds of rebatching, some quicker than others. I will be posting on rebatching in the near future.

Reconstruction
The other option, I have termed reconstruction. You are going to reconstruct the look of the unwanted soap, by transforming it as a constituent part of another batch of soap. You could chunk it up for an aggregate terrazzo or mosaic tile look...

cubes of three coloured soap embeds...


...used in our Roman tesserae inspired 'Bath House' soap

...or slice into strips for geometric designs, plane for soap curls, or grate it up for confetti embeds....


A load of brightly coloured grated soap shreds...

 ...used as confetti embeds in our 'Party Hearty' soap


Lots of choices. Or, you could grate it and squish it up to make soap balls!


A shreddy designed soap into confetti soap balls


Next week I'll be posting all about just that. Balls aplenty :D . But for now, I'll be raiding my rebatch bucket and planning some more creative soap saves!


* a quick useful term I coined for my notes. Basically re-using a soap as a decorative element in another batch of soap.

Wednesday, 1 May 2019

Saturday, 20 April 2019

We're transitioning... From Wordpress to Blogger that is, (yeah, I know...)

Apologies, nothing much to see here at present as we're transitioning from our wordpress blog to here. In the meantime, here's a pretty picture...*


* 'Lavender Love' cold process 'wet soap' in the mould.


Monday, 15 April 2019

To watermark or not watermark? That is today’s question…

Boy, have I taken a lot of photographs of my soaps over the years. I mean, hundreds and hundreds. Many don't get to see the light of day, as I consider myself to be a bit of a perfectionist, (read 'clumsy perfectionist' as my many typos can attest). Sometimes, I get it right and all elements align; composition, lighting, product execution, no extraneous matter cluttering things up, no dreadful shadows or bleaching. So I do a little happy dance and fling my images out into the webesphere. "Hooraaay!" I exclaim, content that I have executed a job well done.

Then, in soapy forums & Facebook groups I hear tales of stolen images, people brazenly stealing others hard work and palming them off as their own. I'm fortunate that this hasn't happened to me, (as far as I know), but the heart sinks at the prospect.

Back in the forums, much blether and justifiable vitriol later, the consensus is you must stamp your authorship on your images, by means of overlaying a discreet logo or water mark over your images.

Taking the latter, this poses problems of its own, not least of which, a dirty great watermark detracts from the picture, even though faint, they can be obtrusive, spoiling your perfect picture, like some authoritarian right to pass stamp. So what to do? Stick with it, because, well people can still discern your work, or go for the discreet logo? Well, I've done both, (not at the same time, crikey), and I think, I favour the logo. Which is a pity, because I've only just realised this after tweaking and posting quite a few pictures out there sporting full flavour watermarks, (sigh).


The logo has one main issue of its own, that it can be cropped out. Usually, logos aren't dolloped on top of the main focus of the picture, usually occupying space around the edges, so as to not obscure, obviously. This stamp of authority / authorship may be enough to deter most image thieves, as to be frank, there are tons of other 'naked' images out there which could be nicked. An image with a watermark or logo is going to require extra work to eradicate it, so chances are thieves will pass, unless you're the Diane Arbus or other equivalent of product photography, (or the Auntie Clara of the soapy world), you're probably going to be just fine, (she types nervously).


I don't know if I've got it right. Is my logo too small? Too large? Is it in the right place? Am I being too critical? Does it really matter? Well, I think, it doesn't look terrible, so that's good. Will it be enough to protect my image? Probably. Maybe. I don't really know. At least I have made the effort and if nothing else, when people see my images of my products, there'll be no doubt who made them and that I am proud to add my business name to them.

Wednesday, 10 April 2019

Is there anybody out there? And beer soap!

It's been a while. Remember when blogs were all the rage? Everybody had one it seemed. With Facebook cornering the market on loose verbiage / idle chit-chat and random snaps, the more considered blog seems to have been sidelined somewhat, which is no bad thing if your blog ended up stuffed with content only your mum could be proud of.

That said, blogs still remain. They are the 'nerd out' spaces of the social media world par excellence. And they are followed too, that is if content is engaging and those bloggers can keep up momentum, which is quite often, where I have fallen down. Life sometime just gets in the way and frankly the personal things which have preoccupied me are nobody's business, certainly not for broadcasting on a soapers blog! Oh and then there's all the other online stuff to juggle, Etsy, Pinterest, Facebook, Twitter and heaven forfend, a website too and fine honing SEO! Argh! Digital presence could be a full time job in itself... In short, yes, I've been guilty of letting my blog slide.

So, after a considerable absence, I'm back to posting. I may not have many, (any?) followers, but I can at least post a bit from time to time, hoping for some kind of engagement. It's a veritable digital forest out there and this blog is but one leaf on my soapy business sapling, (not sure I like that analogy, but hey-ho). To thrash the metaphor further, I need that sapling to grow, so am trying all I can on a very tight budget to make it happen, lets hope it gets enough light to do so!


Re soap, I've not been idle. Here's a picture of a recently made batch of 'Amariillo' beer soap, made with the glorious Coventry based micro-brewery Twisted Barrel Ale's Amarillo pale ale. It's available from my Etsy shop, (just click the ETSY icon).